PHOTOMONTAGE
The PHOTOMONTAGE module offers unsurpassed features to create a realistic visualization of a WTG project or any 3D object (e.g. power mast) in a landscape photo (normal or panoramic view) or based on Google Street View images. The module can also generate artificial landscapes as a wire grid or with artificial surface textures.
-
Visualizations on photos
Perfectly visualize your 3D model on any photo. Advanced calibration tools help you to ensure you get the correct result
-
Wind turbines
Huge library of 3D models including hundreds of wind turbines. Auto generation of reports -
 PV plants
Photorealistic rendering of PV plants. Use the PV module to design the plant and visualize it with PHOTOMONTAGE -
SketchUp integration
Full integration with SketchUp boosts the way you work with 3D models -
Easy and accurate calibration tools
Use maps, known GIS points and elevation model to calibrate the camera -
Online access to terrain data and background maps
Access global elevation data, maps and satellite images

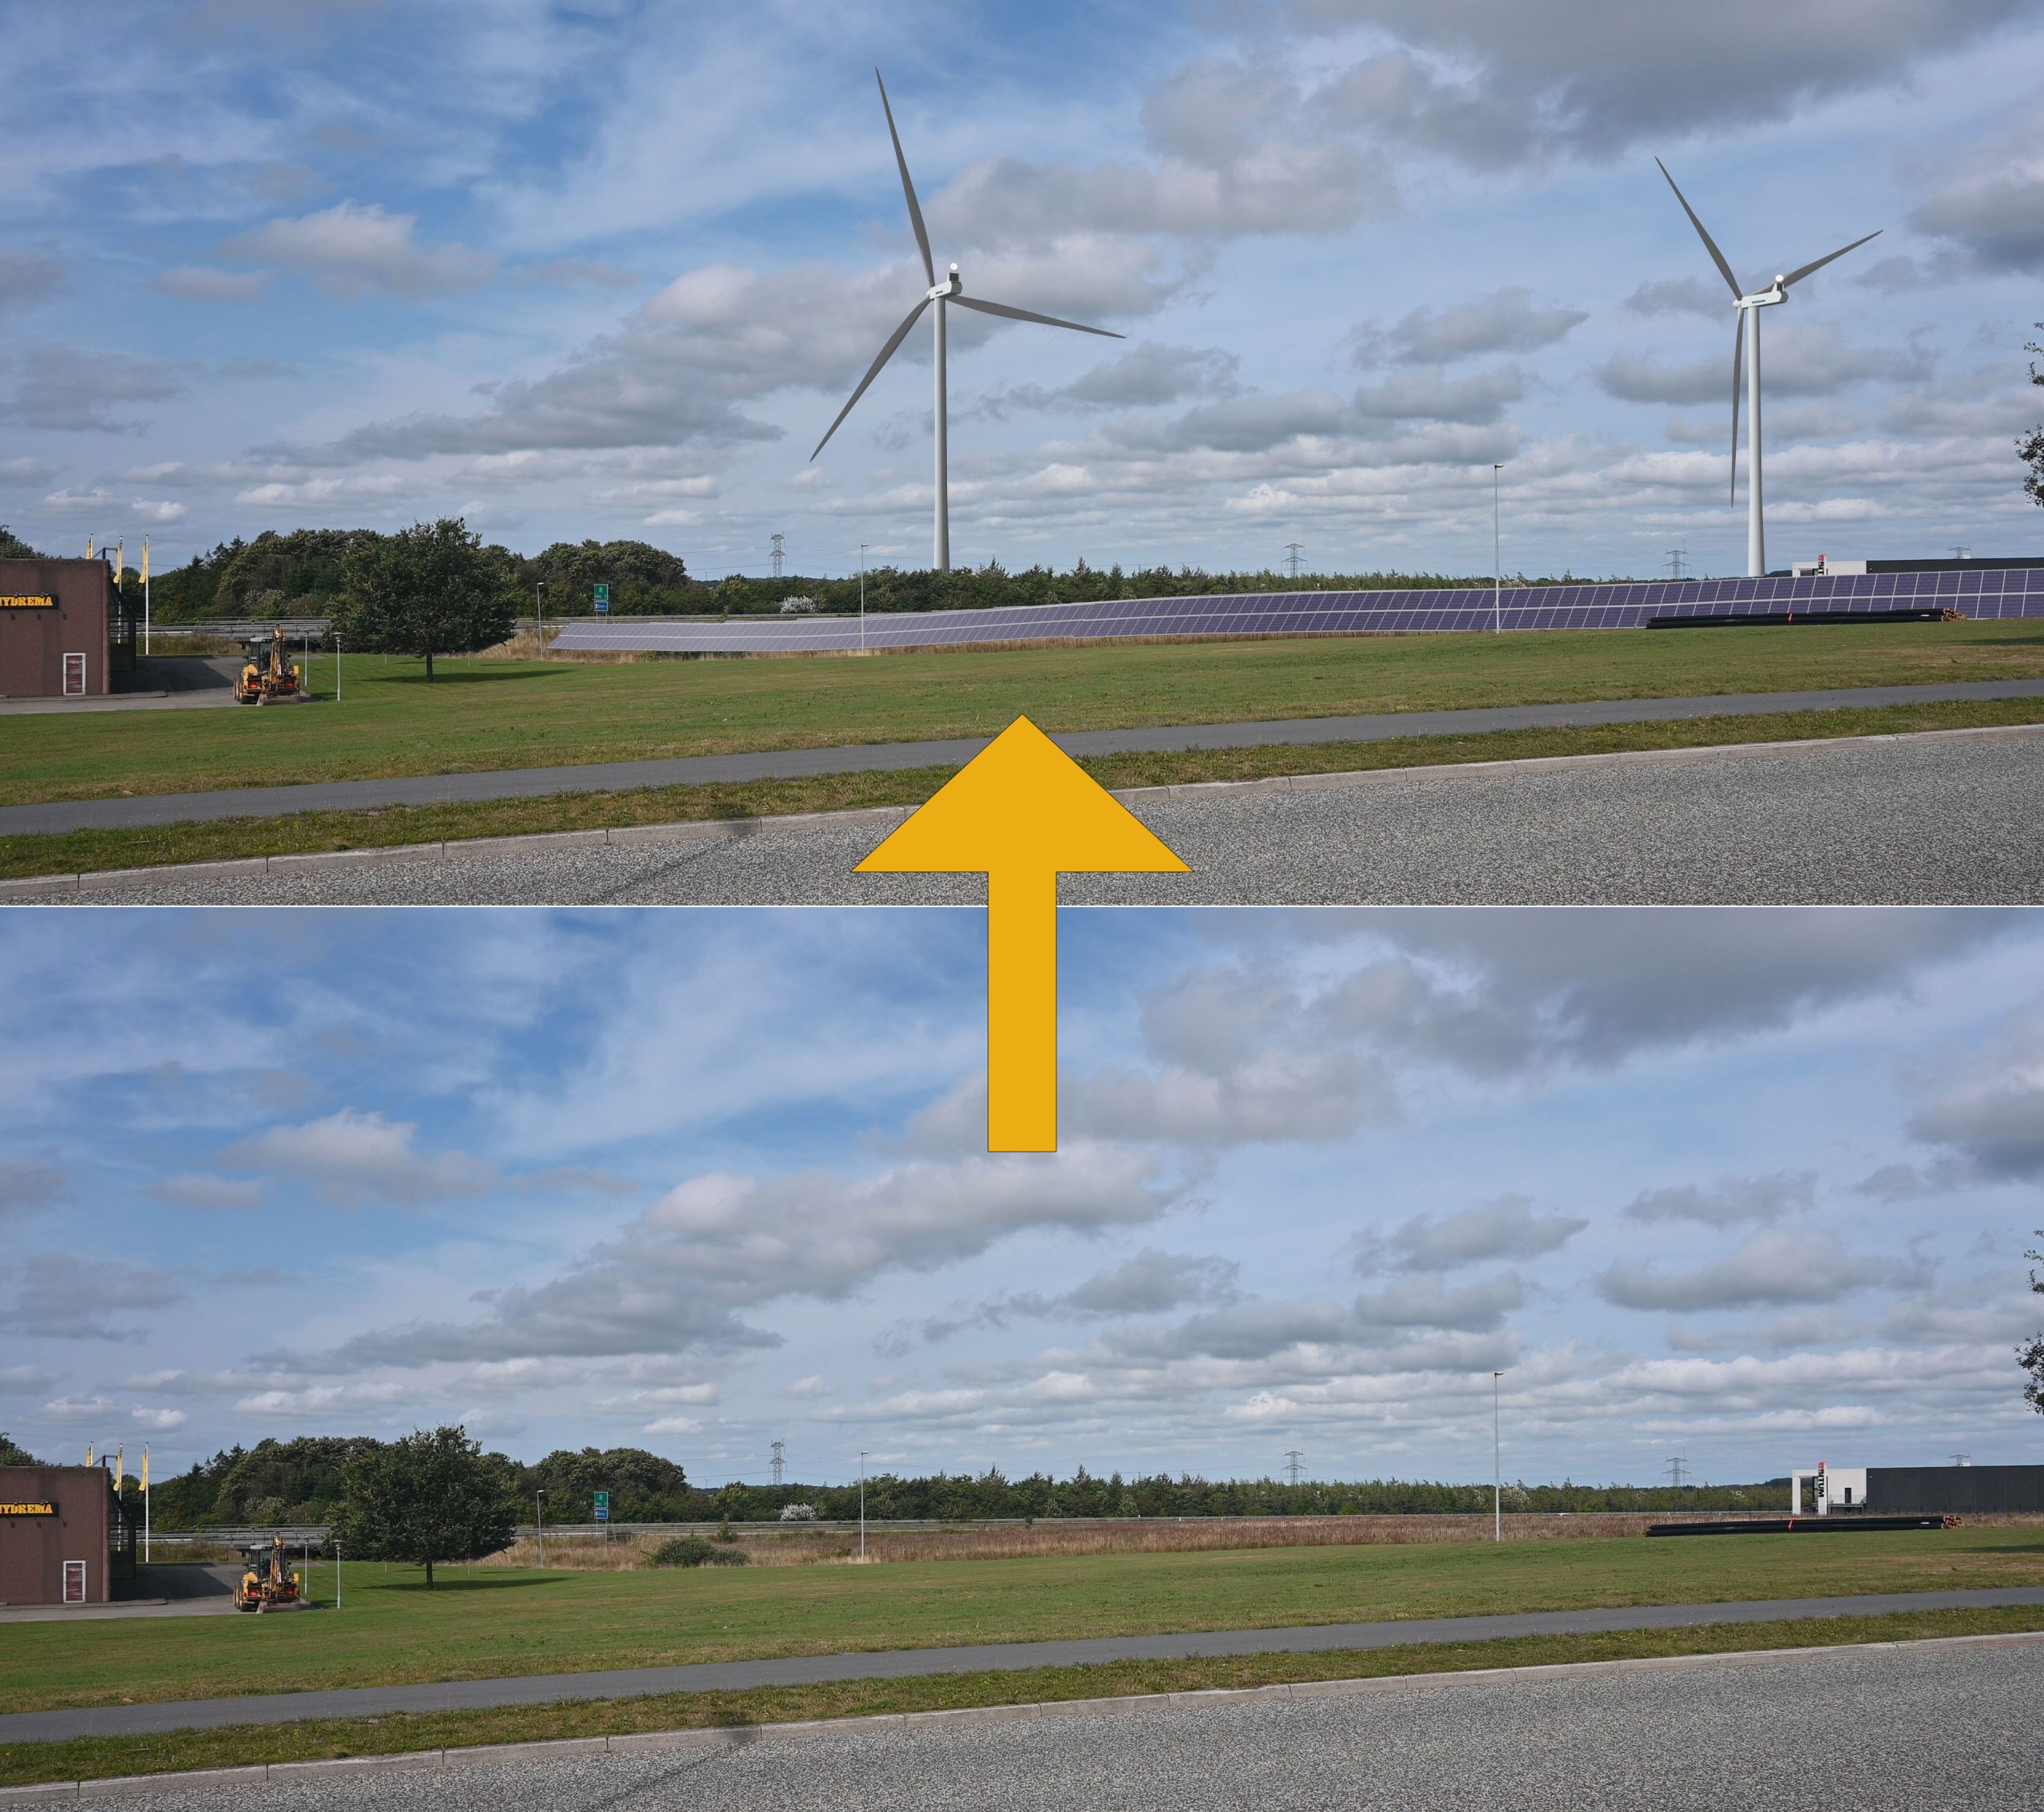
Visualizations on photos
With PHOTOMONTAGE, the visualizations on photos are so realistic that the wind or PV solar farm project becomes true before it is built. Apparent size, shape, dimension, position, light shading are all considered by the model to represent the future wind turbines, solar PV plants and/or 3D elements as they are going to look like in reality from the given point of view.
Wide range of photos can be used: high resolution photos, open landscape photos, panoramas, up to 360° cylindrical photos.
Besides photos, visualizations can be produced in a more schematic design with artificial or wire-grid landscape (based on included elevation data).
The model is based on an elevation model considering the Earth curvature and auto erase function for parts hidden by the landscape.
Pixel-perfect fine tuning is possible (but not necessary), for example for calibration or when parts of the rendered object are partly hidden and should be erased.

Wind turbines
The layout of wind turbines can easily be defined in the GIS like platform and changed to consider different variants.
Specific models of tower, nacelle and blades are available (more than hundreds) and customizable. Aviation warning lights can be added or any 3D elements (transformer station, offshore foundations…) from the library or dae files.
Several options are available to provide efficient documentation of the photomontage such as: turbines can be shown in a specific color, as a wire-grid, or with automatic annotations on the photo to highlight the turbines or wind farms, reports can be generated with all the required information like distance to turbines, number of visible turbines, recommended distance view, field of view
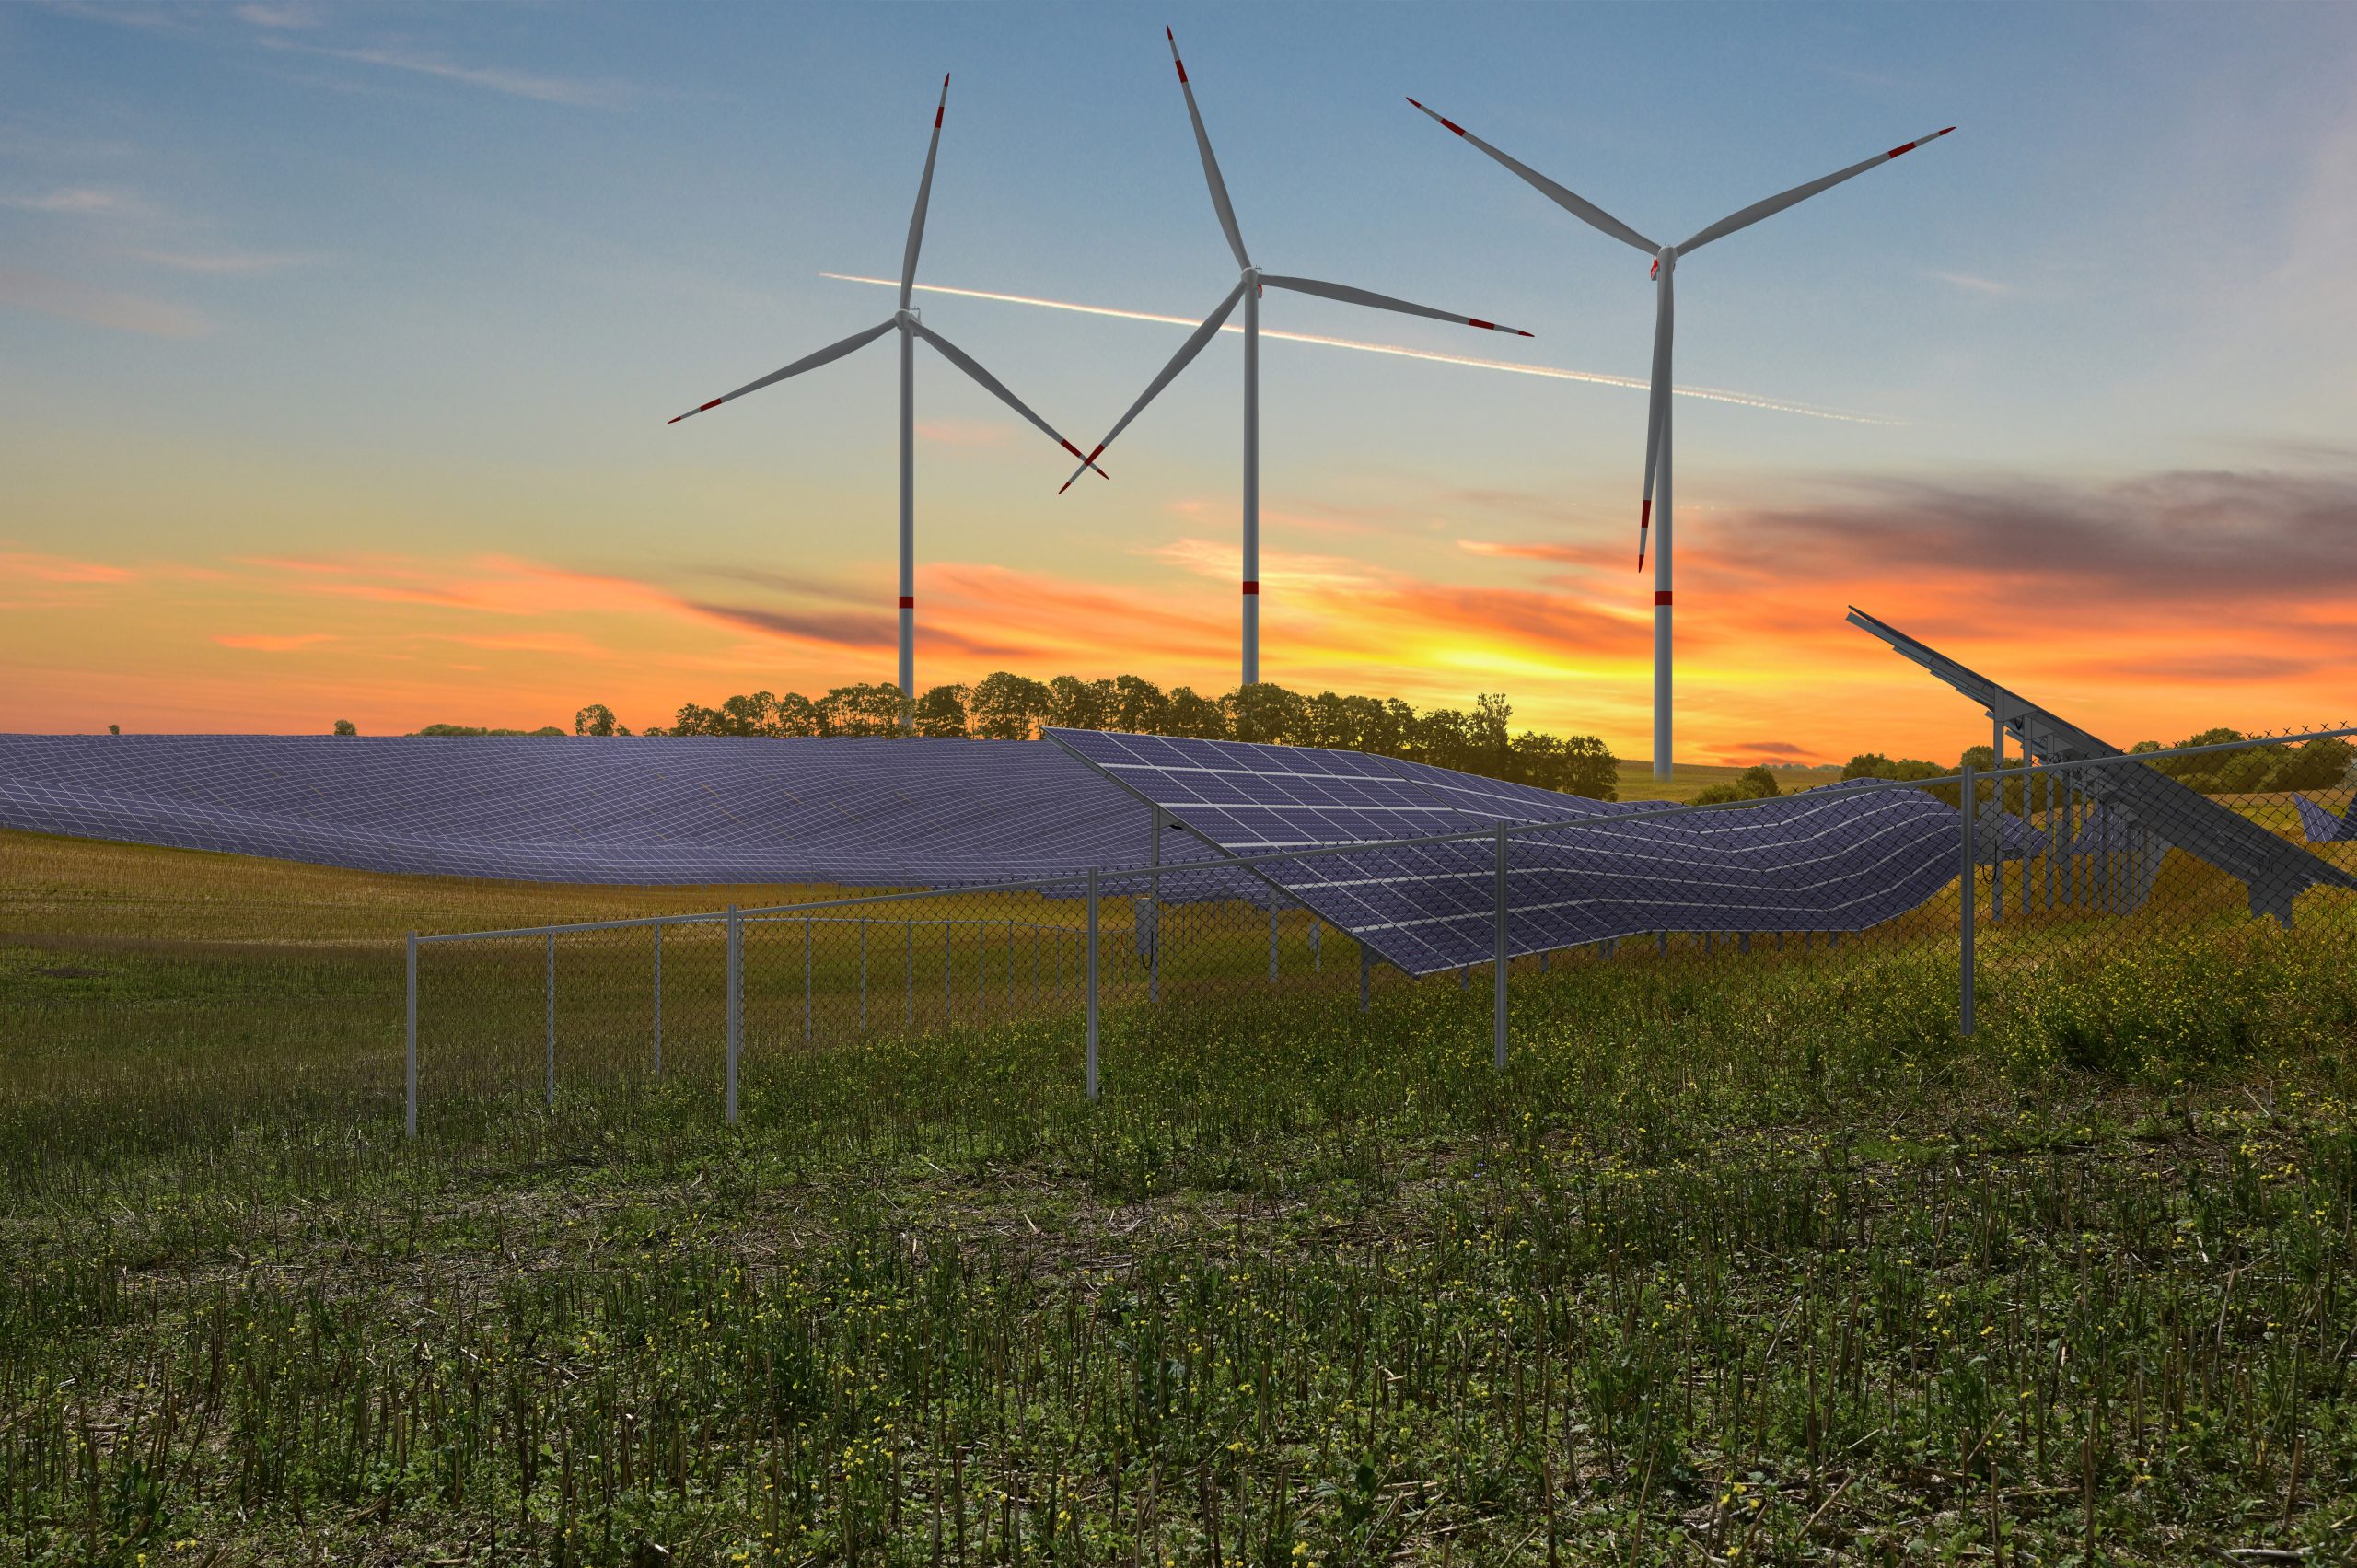
PV plants
Photorealistic visualizations of the PV plant can be created with a few mouse clicks. The PV area can easily be defined using the SOLAR PV module. The rows of PV panels follow the shape of the landscape (from elevation data), the panels are simulated with the correct dimensions, orientation, inclination, position and time dependent lighting conditions.
Use windPRO’s PV-panels library and options for auto design of layout and tables can be used or use your own models.
SketchUp integration
SketchUp can be used as a 3D editor for objects to render on the photos. Together with the SketchUp Integration Module it is possible to export photo-matched images to SketchUp as well as background maps, elevation data and much more. 3D elements from 3D Warehouse can be used with great ease.
SketchUp can be used to make a web-based 3D presentation of the visualizations created with PHOTOMONTAGE.
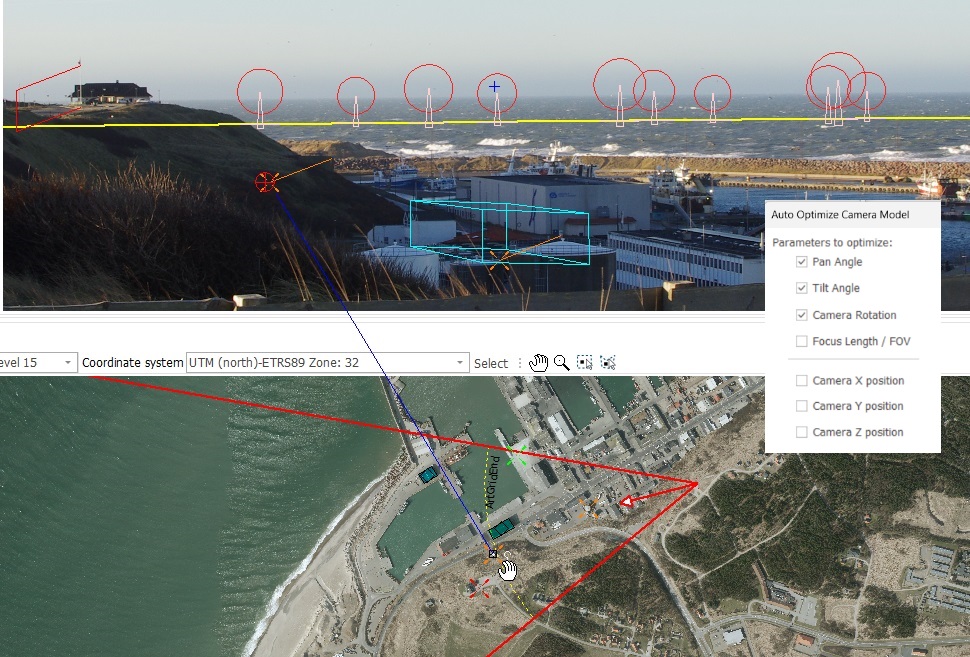
Easy and accurate calibration tools
To ensure a high precision, the calibration of the photo is essential. Luckily this is not a problem with PHOTOMONTAGE given the various tools that can be used for that purpose: known GIS points entered by coordinates or directly from the map (Online satellite image of high resolution available for most countries), horizon line, surface wire-grids, trace lines (use one camera to calibrate another).
PHOTOMONTAGE can even do the calibration for you with the Auto-optimize option.
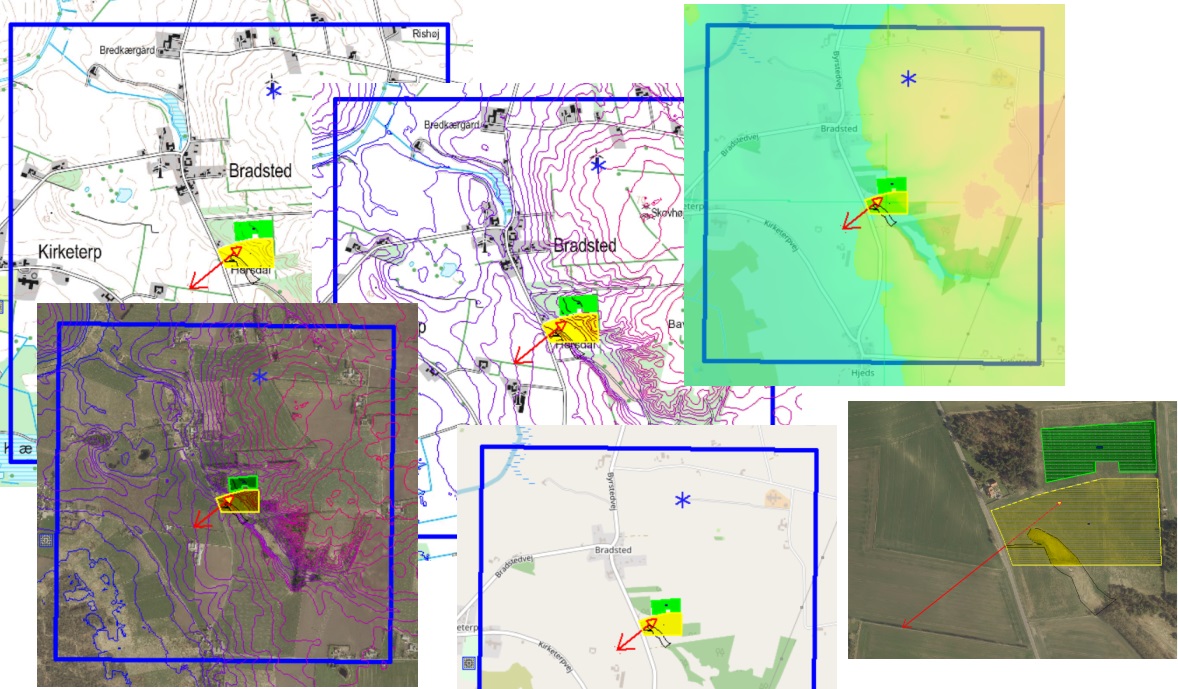
Online access to terrain data and background maps
Elevation data is available online from windPRO as global data and more and more as high resolution national data. With this data, the z coordinates of any wind turbines, solar panel, photo point and reference point is taking care of for you. Elevation data is also used to generate artificial landscape and wire grids surfaces, and the horizon line.
Online maps and satellite images are of great help at the stage of layout design, photo calibration and masking of foreground obstacles.